You can use webhooks to trigger Lumify automations by sending a webhook request from other services.
Overview
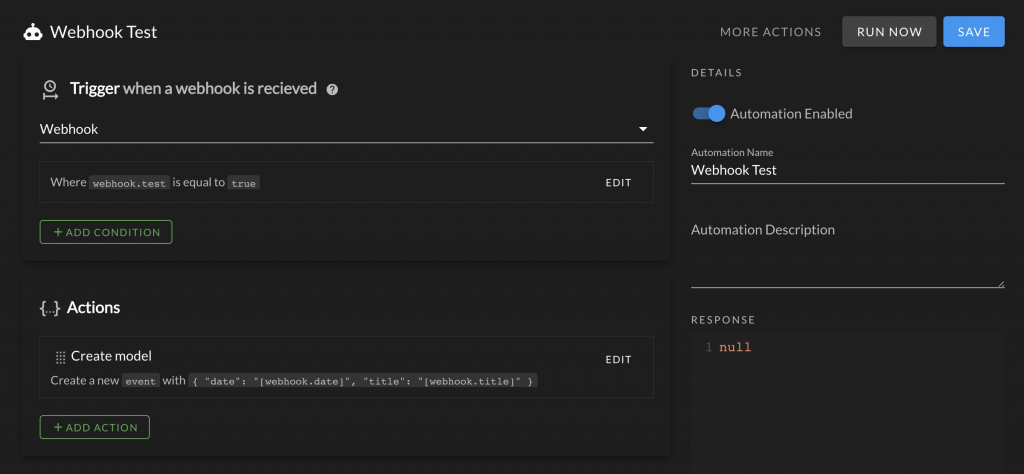
When a HTTP request is made to the webhook endpoint (e.g. https://[yourdomain].lumify.app/api/automation/[automation_id]/webhook), the associated automation will be triggered. Only PUT and POST requests are supported. To get started, create an automation that uses the "Webhook" trigger:

Finding your webhook URL
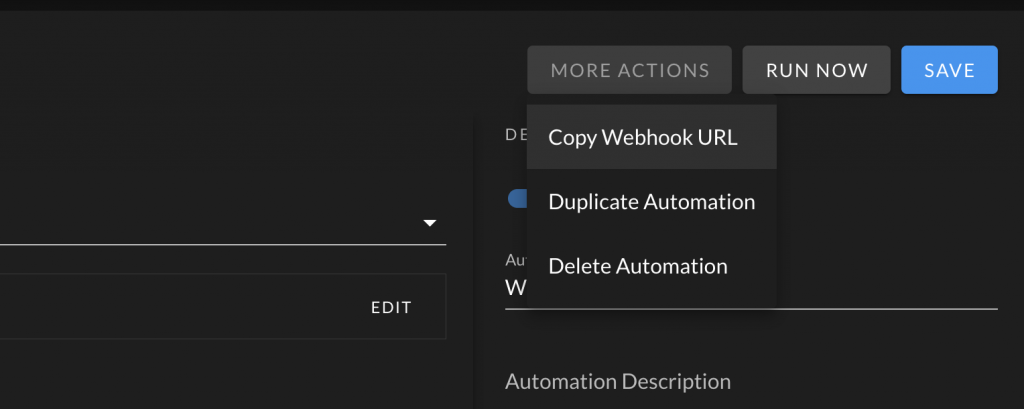
Automations that use the Webhook trigger have a "Copy Webhook URL" option under the "More Actions" dropdown:

Passing data to the automation
You can pass payload data to the automation via the webhook request body. Payloads may be sent as a query string, encoded form data, or JSON. Data will be available to an automation as webhook.[field] (for example the screenshot above uses webhook.date and webhook.title). Ensure the "Content-Type" header is set appropriately for your payload type (e.g. JSON payloads should set to "Content-Type" to "application/json").
Testing your webhook
Before using your webhook, you should test it using API client tools like Postman or Insomnia.
Additionally, The "Run Now" button can be used to conduct basic tests. When using the "Run Now" button, webhook.test will be sent as a payload to your automation.
Security
Webhook endpoints don’t require authentication, other than knowing a valid automation ID (which itself is a universally unique and obscure identifier). But do not count on this. Anyone with a valid webhook automation ID can trigger an automation. Security best practices for webhooks include:
- Consider adding a trigger condition with a "secret key" that must be passed with the webhook request.
- Do not use webhooks to trigger automations that are potentially destructive. For example, do not use a webhook to create users with administrator privileges.
- Treat the automation ID like a password: treat it like a secret and do not share with others.